Building keyboard from scratch
skills used:
- soldering
- coding in C (flashing firmware, QMK)
- creative
- PCB design
For this project I selected an ergonomic design from a niche keyboard maker in Japan called Foostan. Rather than building the keyboard from a kit, I decided to assemble it completely from scratch, even to the extent of having the Printed Circuit Board (PCB) manufactured and shipped from overseas.
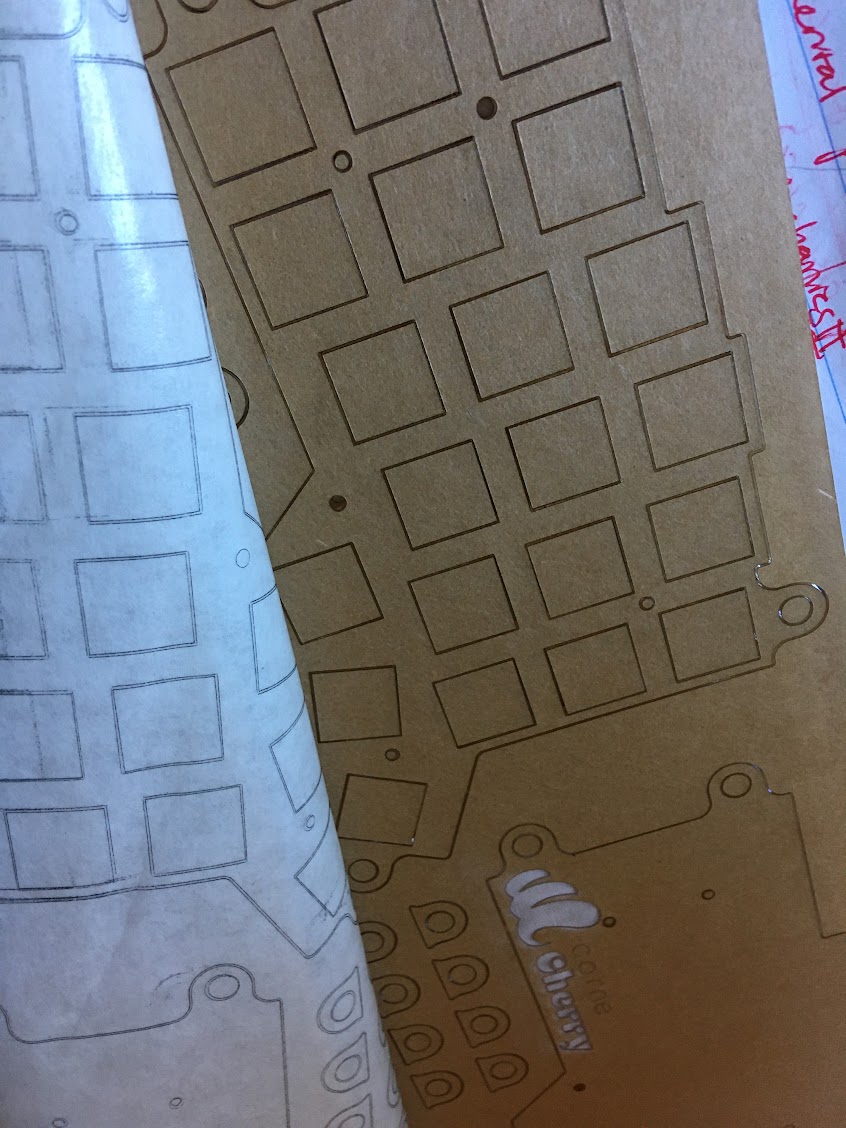
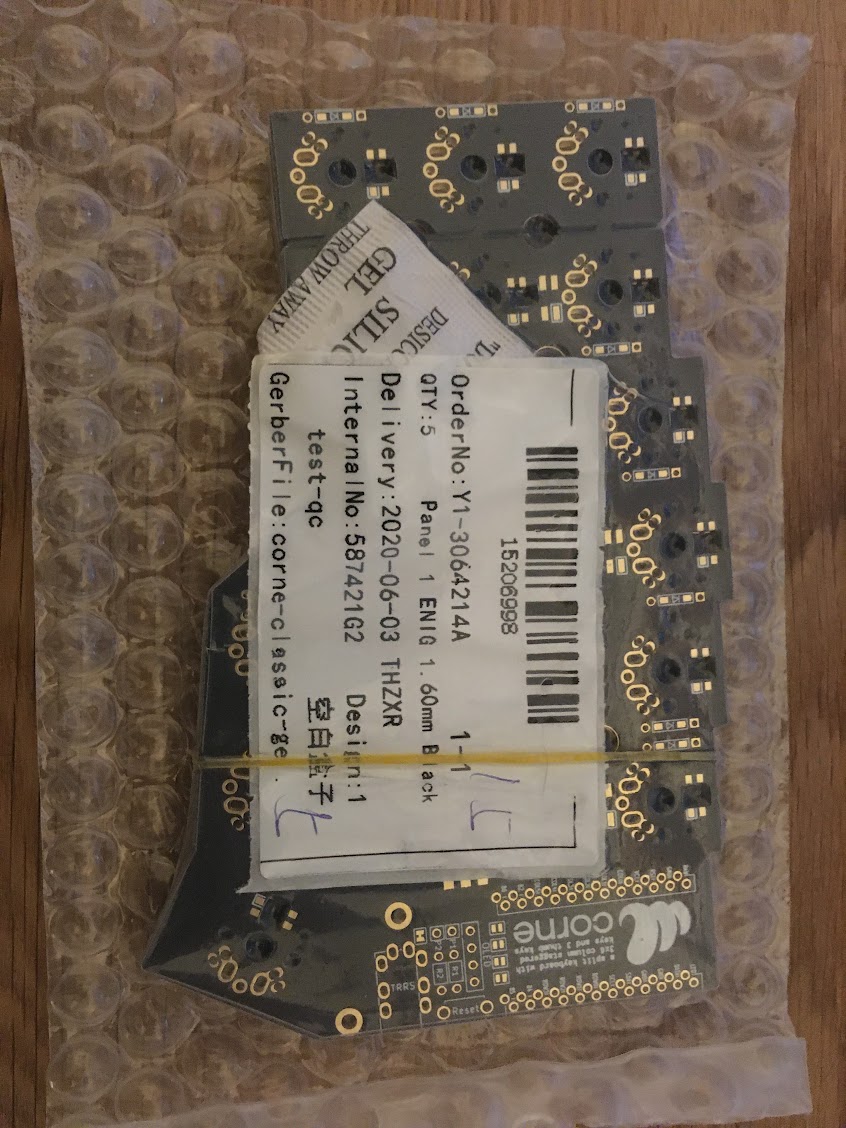
The first step was to order the Printed Circuit Boards (PCBs). I decided to use the PCB manufacturer JLCPCB, a Chinese company specializing in low quantity prototyping. I found a blueprint for Foostan’s Corne keyboard freely available on Github. This particular keyboard was the most appealing to me for its cyberpunk aesthetic. My next step was to convert the PCB blueprint to a GERBER format using KiCad and submit my order to JLC. I also ordered the plates to hold the keycaps from JLC, using blank PCB boards with sized holes and no circuits.
Then it was time to order the backplates. I wanted them to be transparent so that the RGB LEDs would shine through and illuminate the desk. For this, I opted for simple laser cut acrylic panels. I submitted the order specifications to a company called Ponoko.
I identified the screws and spacers that would fit the holes in the PCB and plates, and ordered them from Aliexpress, along with the LED screens and necessary microcontrollers (one for each half of the keyboard). I also used LCSC, a sister company to JLCPCB that sells electronic components direct from Shenzen.
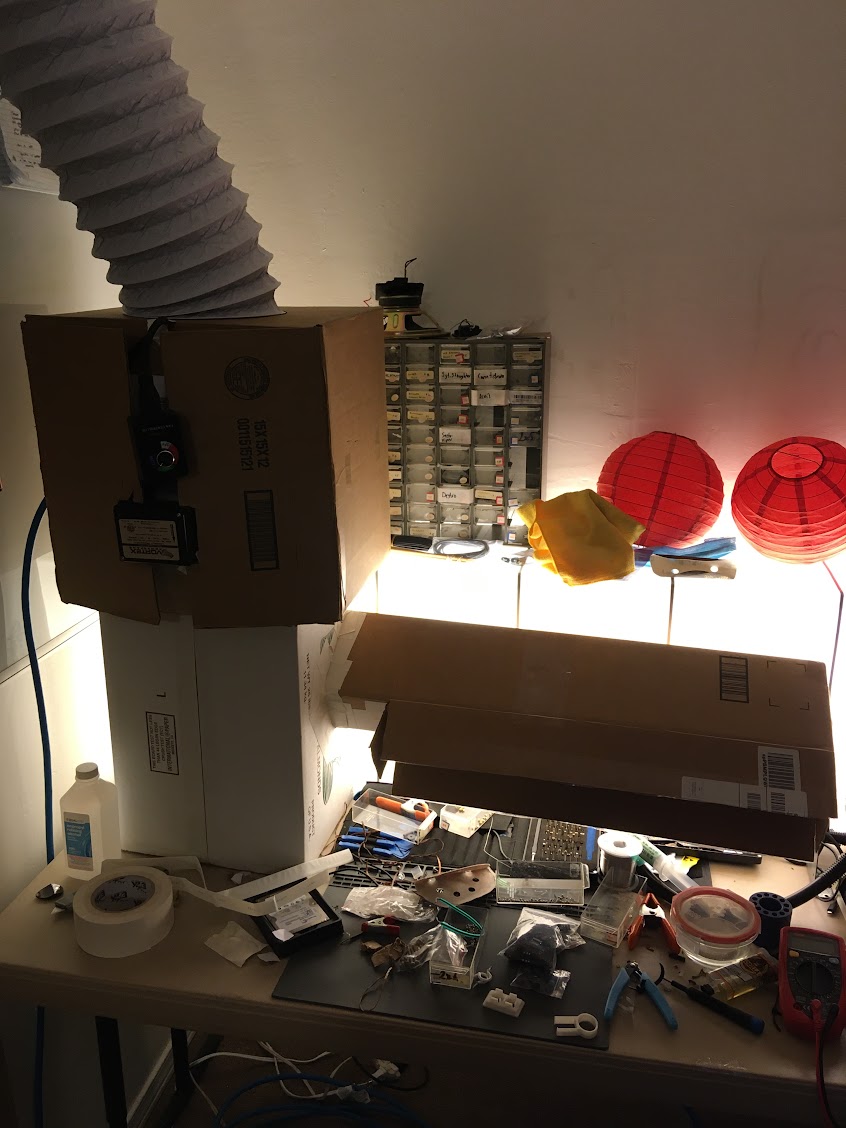
 Finally, the packages arrived over several months and I was able to start building. I bought a duct fan and ran it out of my window to make sure my bedroom remained free of fumes. A bit overkill, but I thought it was fun it make.
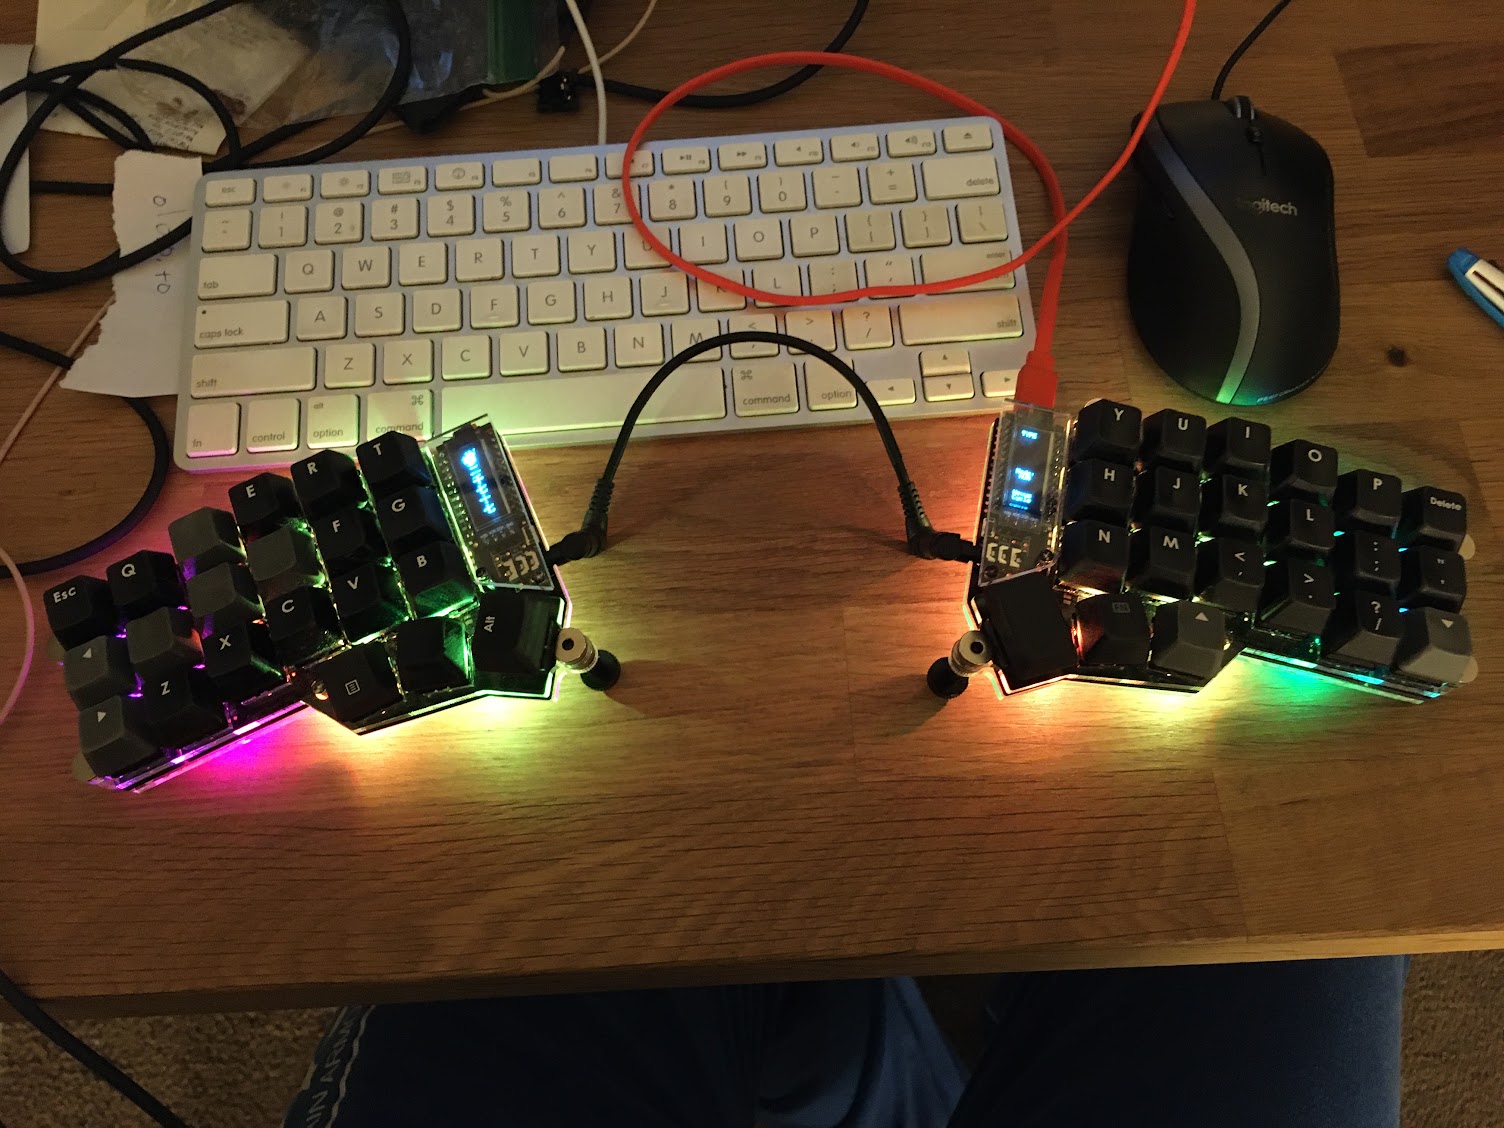
After soldering and final assembly, I flashed a custom configuration package to the microcontrollers using an open source software called QMK Toolbox. I created a custom cyberpunk logo with Japanese text in photoshop to display on the keyboard LED.
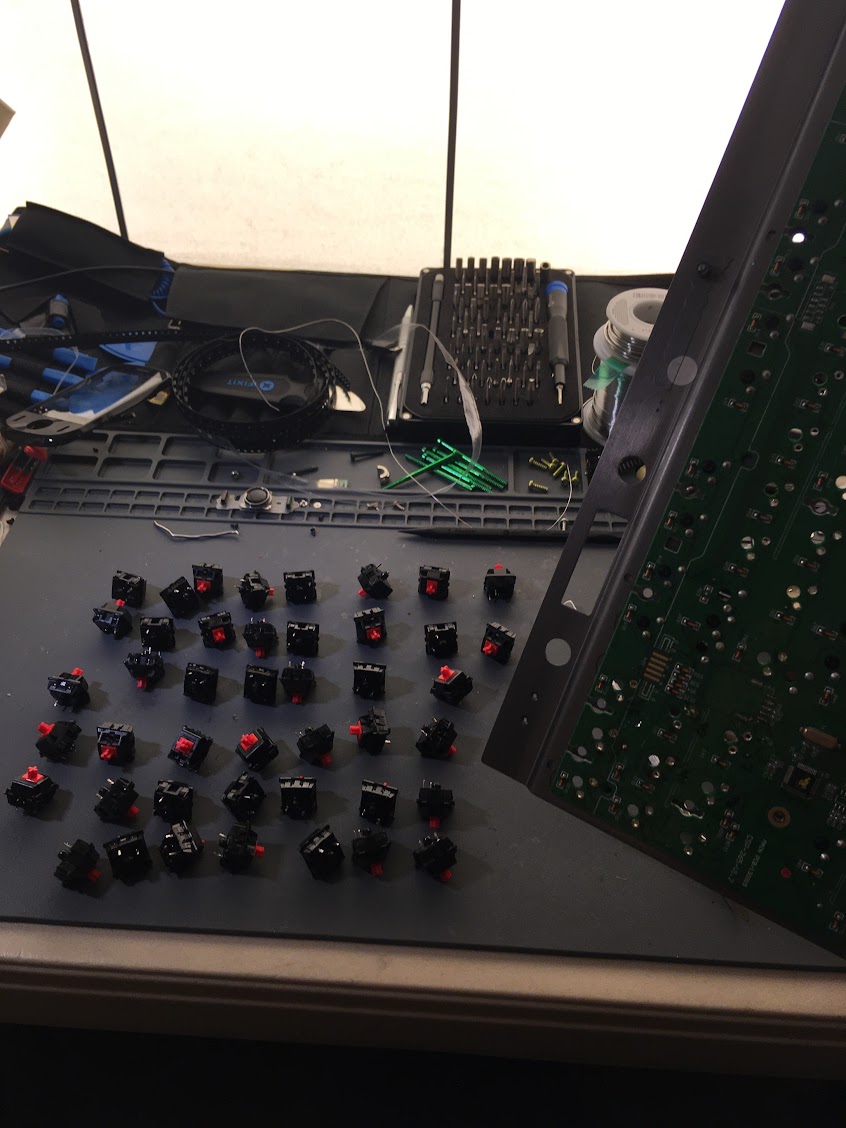
For the switches and keycaps, I recycled the cherry reds from an old, gifted corsair K65. I drastically underestimated the amount of desoldering required, I do not recommend anyone do this. I did not have a solder vacuum -_-
The final product was connected together with a simple aux cord, the same you’d use for connecting a pair of headphones.
Because the keyboard did not have the standard number of keys, there were multiple layers accessed by pre-programmed key combinations. For this reason, the keyboard had quite the learning curve, it was like touch typing, but with three new mini-keyboards to memorize.
photos