<?xml version="1.0" encoding="utf-8"?><feed xmlns="http://www.w3.org/2005/Atom" ><generator uri="https://jekyllrb.com/" version="4.4.1">Jekyll</generator><link href="https://cforcomputer.github.io/feed.xml" rel="self" type="application/atom+xml" /><link href="https://cforcomputer.github.io/" rel="alternate" type="text/html" /><updated>2026-10-25T20:13:04+00:00</updated><id>https://cforcomputer.github.io/feed.xml</id><title type="html">patrick o’brien</title><subtitle>patrick&apos;s projects</subtitle><entry><title type="html">opensleep cooler</title><link href="https://cforcomputer.github.io/opensleep-cooler.html" rel="alternate" type="text/html" title="opensleep cooler" /><published>2026-04-04T00:00:00+00:00</published><updated>2026-04-04T00:00:00+00:00</updated><id>https://cforcomputer.github.io/opensleep-cooler</id><content type="html" xml:base="https://cforcomputer.github.io/opensleep-cooler.html"><![CDATA[<p>skills used:</p>
<ul>
  <li>Arduino (C++)</li>
  <li>3D CAD (Onshape)</li>
  <li>3D Printing</li>
  <li>Electrical</li>
  <li>Reverse Engineering</li>
  <li>Product design</li>
</ul>

<p><a href="https://hackaday.io/project/205182-opencooler">view the project on hackaday (most up-to-date)</a></p>

<h3 id="open-source-bed-cooler">Open source bed cooler</h3>

<p><img src="assets/images/projects/cooler/cooler.jpg" alt="Picture of the cooler" /></p>

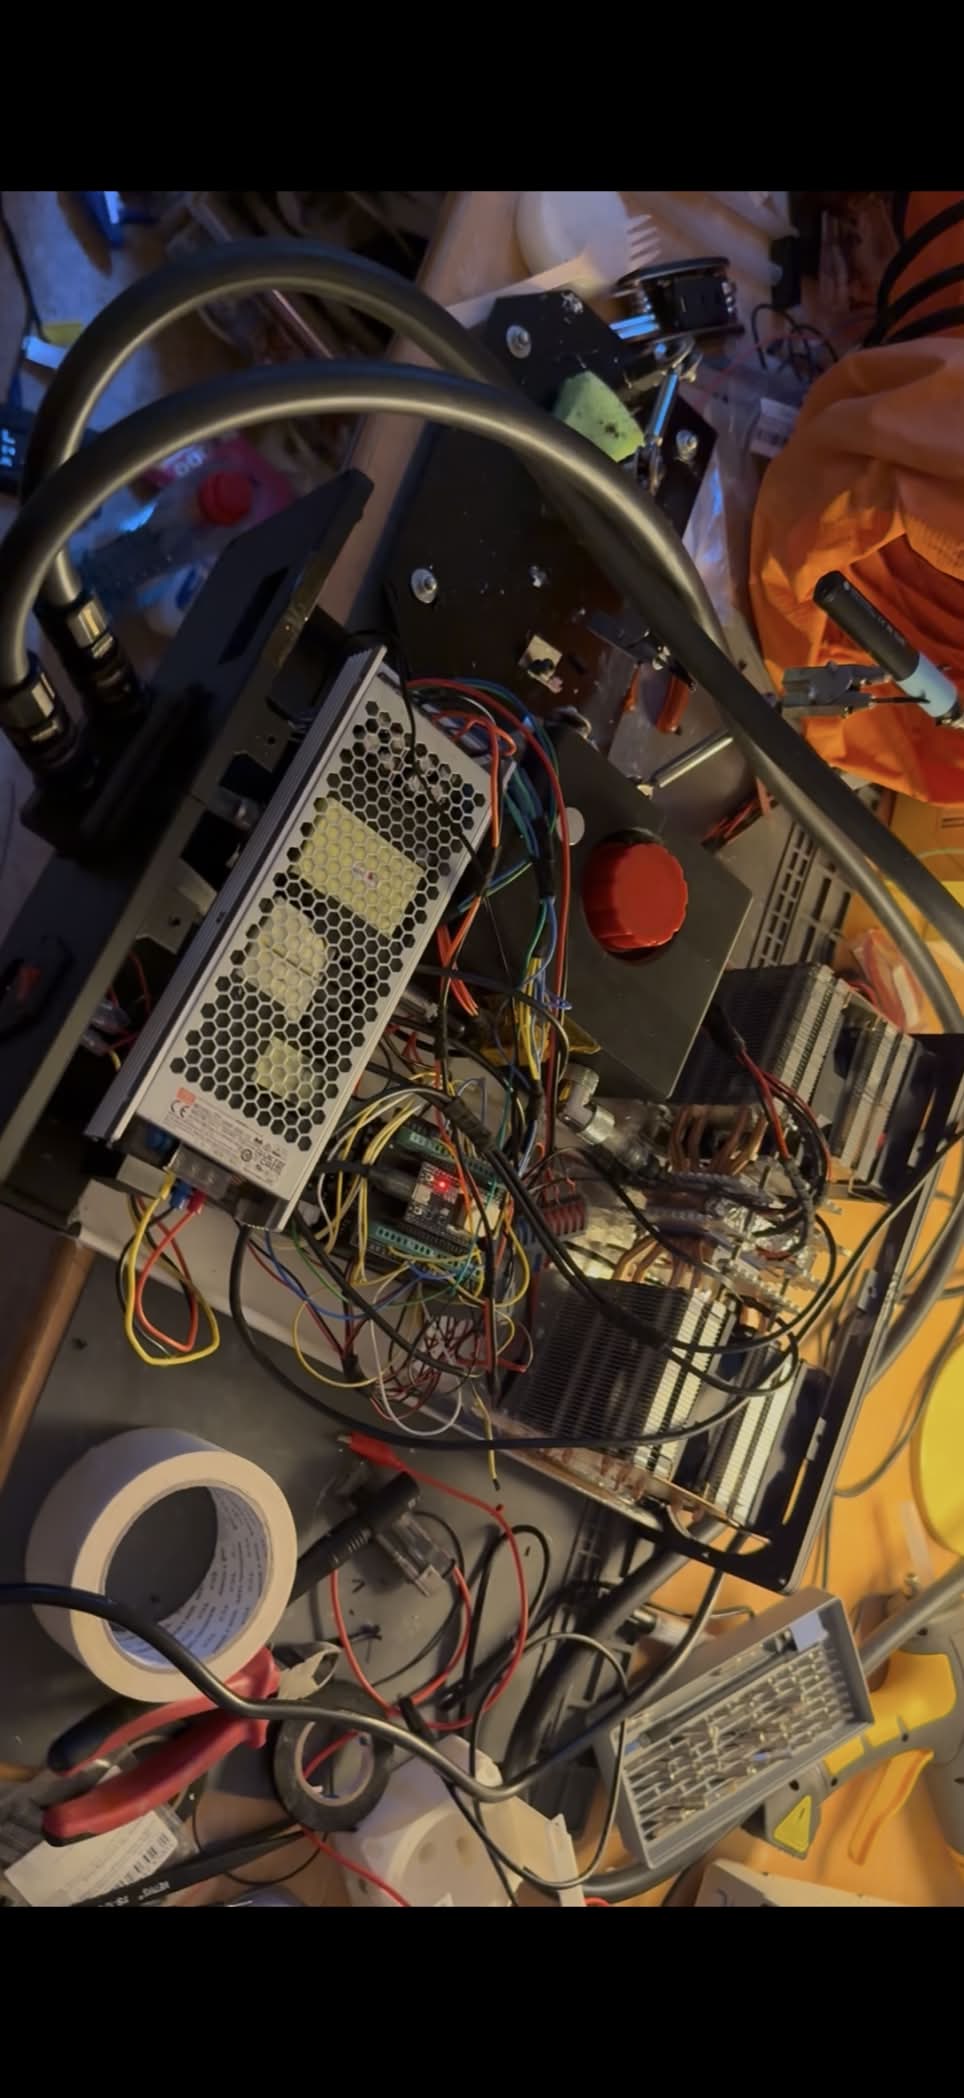
<p>I am maintaining a log of this project on Hackaday instead of my personal blog for visibility. You can find a brief summary here, but all the details and photos are on the Hackaday page after you click the link above. There you can scroll to the bottom of the page for project logs and updates.</p>

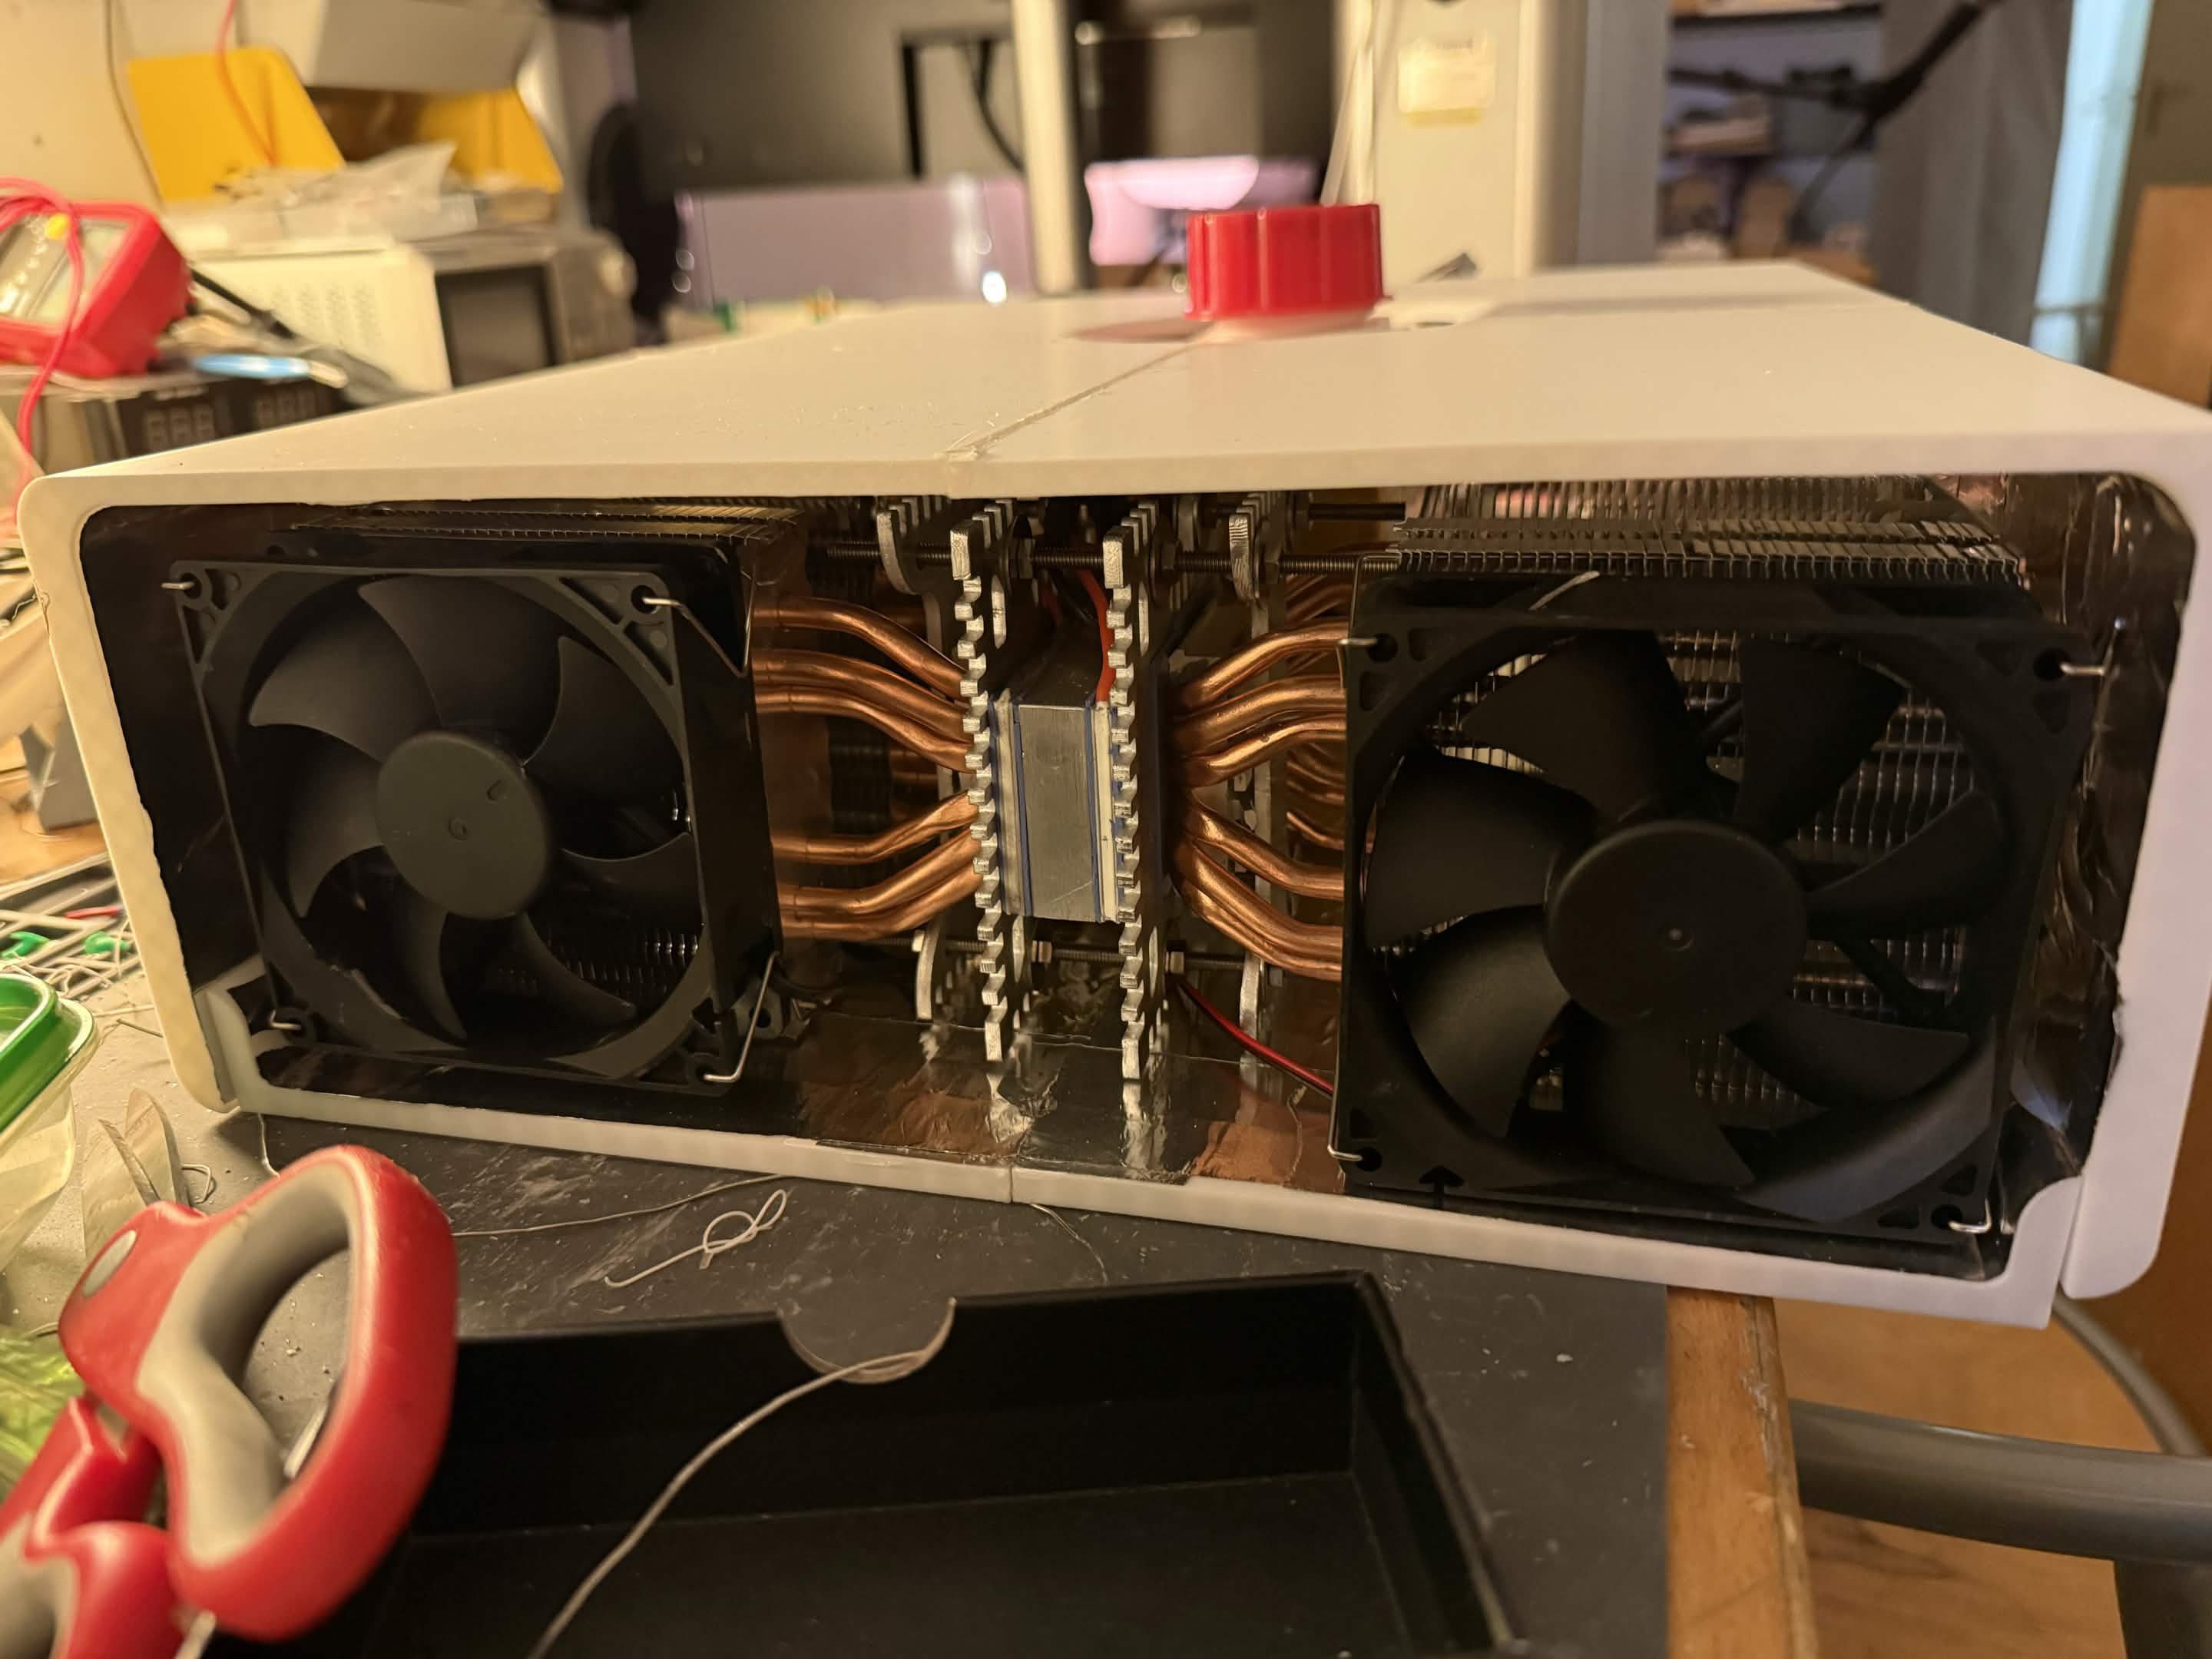
<p>The Opencooler is an affordability-focused precise temperature water chiller or heater for use in a bed mattress. With a universal fitting, it can be used with any attached accessory. The goal is to bring an easy to use solid state climate control system to anyone around the world, so everyone can sleep on a warming planet.</p>

<p><img src="assets/images/projects/cooler/final-assembly-1.jpg" alt="Picture of the cooler" /></p>]]></content><author><name></name></author><summary type="html"><![CDATA[skills used: Arduino (C++) 3D CAD (Onshape) 3D Printing Electrical Reverse Engineering Product design]]></summary></entry><entry><title type="html">internet reseller</title><link href="https://cforcomputer.github.io/internet-reseller.html" rel="alternate" type="text/html" title="internet reseller" /><published>2026-03-05T00:00:00+00:00</published><updated>2026-03-05T00:00:00+00:00</updated><id>https://cforcomputer.github.io/internet-reseller</id><content type="html" xml:base="https://cforcomputer.github.io/internet-reseller.html"><![CDATA[<p>skills used:</p>
<ul>
  <li>Wireless networking</li>
  <li>Network zone management</li>
  <li>Enterprise hardware management</li>
  <li>Driver troubleshooting</li>
  <li>Advertising</li>
  <li>Nederlands taal spreken</li>
</ul>

<h3 id="splitting-gigabit-fiber">Splitting gigabit fiber</h3>

<p>One of the things that I put off for way too long at my apartment in Groningen was getting faster internet. The main reason I didn’t was simply because I wanted to save money while spending less time in my apartment. Because sitting alone in one’s apartment browsing the internet is kind of depressing.</p>

<p>ANYWAY. Finally I was fed up with using the shared apartment wifi. One single 100mbps connection shared between 20 people is not ideal. Oftentimes it wouldn’t work at all, and I would write my book instead.</p>

<p>It clicked at some point that since my apartment complex was rent controlled, and attracted the kind of people who also wanted to save money, I could simply offer to split the bill between everyone on the fastest gigabit fiber available, which in this case was 4 Gbps symmetrical fiber since I was in the middle of the city.</p>

<p>I spent several months going back and forth between the store and the Dutch telecom company KPN, and they eventually did send someone out to lay a new line directly to my apartment. Then I wrote on my window advertising the internet share. Two of my neighbors signed up, and I used this as the excuse I needed to spend over a thousand dollars on ubiquiti enterprise networking gear I wanted.</p>

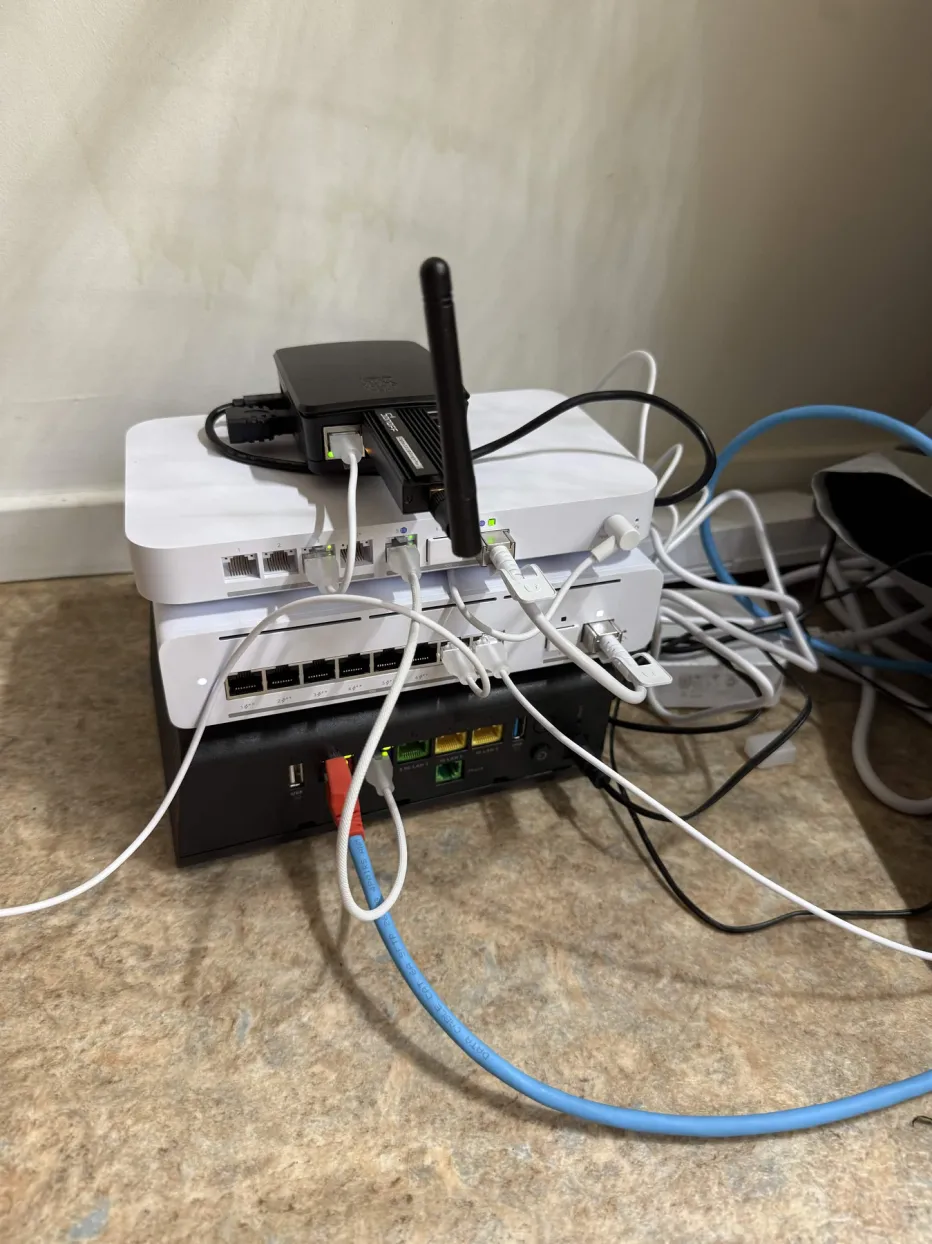
<p><img src="assets/images/projects/networking/networking-setup.webp" alt="Picture of networking setup" /></p>

<p>The core of the setup was a UniFi Cloud Gateway Fiber running UniFi OS, which handled routing, firewalling, and DHCP for the building. Each household got its own network on a separate VLAN, with a dedicated SSID mapped to it. Using UniFi’s zone-based firewall, I placed the tenant networks in their own zone with a default-deny policy between them: every network had internet access, but none could reach the others, and management access to the gateway was restricted to my own network. That kept everyone’s smart TVs, speakers, and other IoT devices on their own segment instead of exposed to the whole building.</p>

<p>Wireless ran on a U7 Pro Max (tri-band Wi-Fi 7, including 6 GHz), and everything was uplinked through a compact 10G switch. Exceptionally overkill, but that’s what I needed after decades of slow, barely functional internet. The main bottleneck ended up being my own computer: its onboard NIC couldn’t keep up with the line rate, so I added a multi-gig network adapter and worked through its driver issues to actually see 4 Gbps.</p>

<p>Cost per person? $20 per month. Everyone including me was very happy. I found that delivering a service that brought relief to people was well worth the money. I think more people could benefit from having side hustle hobbies like this that help their communities. If you’ve been thinking about something for a while… just do it!</p>]]></content><author><name></name></author><summary type="html"><![CDATA[skills used: Wireless networking Network zone management Enterprise hardware management Driver troubleshooting Advertising Nederlands taal spreken]]></summary></entry><entry><title type="html">the idea list</title><link href="https://cforcomputer.github.io/idea-list.html" rel="alternate" type="text/html" title="the idea list" /><published>2026-01-01T00:00:00+00:00</published><updated>2026-01-01T00:00:00+00:00</updated><id>https://cforcomputer.github.io/idea-list</id><content type="html" xml:base="https://cforcomputer.github.io/idea-list.html"><![CDATA[<p>skills used:</p>
<ul>
  <li>Creativity</li>
  <li>Imagination</li>
</ul>

<p><a href="https://github.com/cforcomputer/ideas">Link to the idea list</a></p>

<h3 id="an-idea-a-day-keeps-alzheimers-at-bay">An idea a day keeps Alzheimer’s at bay</h3>

<p>An idea itself is an often useless thing. I have hundreds, if not thousands of ideas per month, and most of them are absolutely rubbish and not good for anything. They repeat too, and I’ll forget that they repeat. I forget if I don’t write them down. Link to my list of ideas above. I update it whenever I have some extra time.</p>

<p>Some old guy in my extended family, who is the professor who kicked Bill Gates out of Harvard said I shouldn’t publish these. Another old rich guy said ideas are cheap, and that it is only the execution of the ideas that matters. You decide I guess.</p>]]></content><author><name></name></author><summary type="html"><![CDATA[skills used: Creativity Imagination]]></summary></entry><entry><title type="html">an e-ink vr headset</title><link href="https://cforcomputer.github.io/e-ink-vr.html" rel="alternate" type="text/html" title="an e-ink vr headset" /><published>2025-12-23T00:00:00+00:00</published><updated>2025-12-23T00:00:00+00:00</updated><id>https://cforcomputer.github.io/e-ink-vr</id><content type="html" xml:base="https://cforcomputer.github.io/e-ink-vr.html"><![CDATA[<p>skills used:</p>
<ul>
  <li>Soldering</li>
  <li>Research</li>
  <li>Arduino</li>
  <li>Electronic testing</li>
  <li>Troubleshooting</li>
  <li>Sourcing</li>
  <li>3D printing</li>
  <li>Optics</li>
  <li>CAD</li>
</ul>

<p><a href="https://github.com/cforcomputer/mindwrite">Project code</a></p>

<h3 id="a-new-type-of-vr-headset">A new type of VR headset</h3>

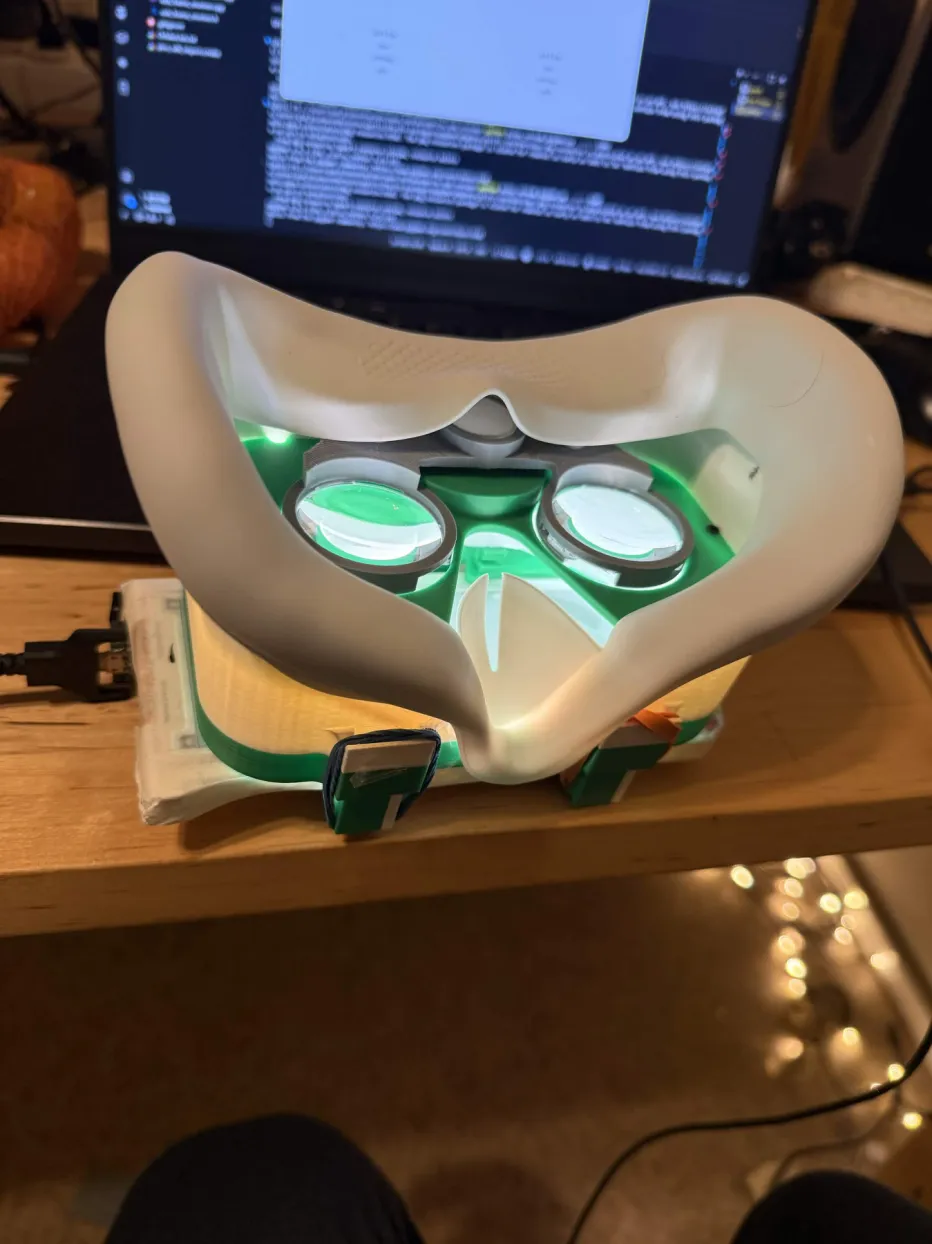
<p><img src="assets/images/projects/e-ink-vr/the-headset.webp" alt="Picture of the headset" /></p>

<p>The e-ink vr headset prototype created here was inspired by the possibility presented by high refresh displays from the creator Modos (will link to it later, look at crowdsupply). I wanted to take that display and see what it would look like displaying a tracked world, something without eye fatigue caused by the rapid strobing of LEDs. I also wanted to see if I could use it for reading and writing. IF I could, then maybe it could be used for people with ADHD who can’t focus when they’re in a stimulating environment. Maybe it could help me write my scifi novel.</p>

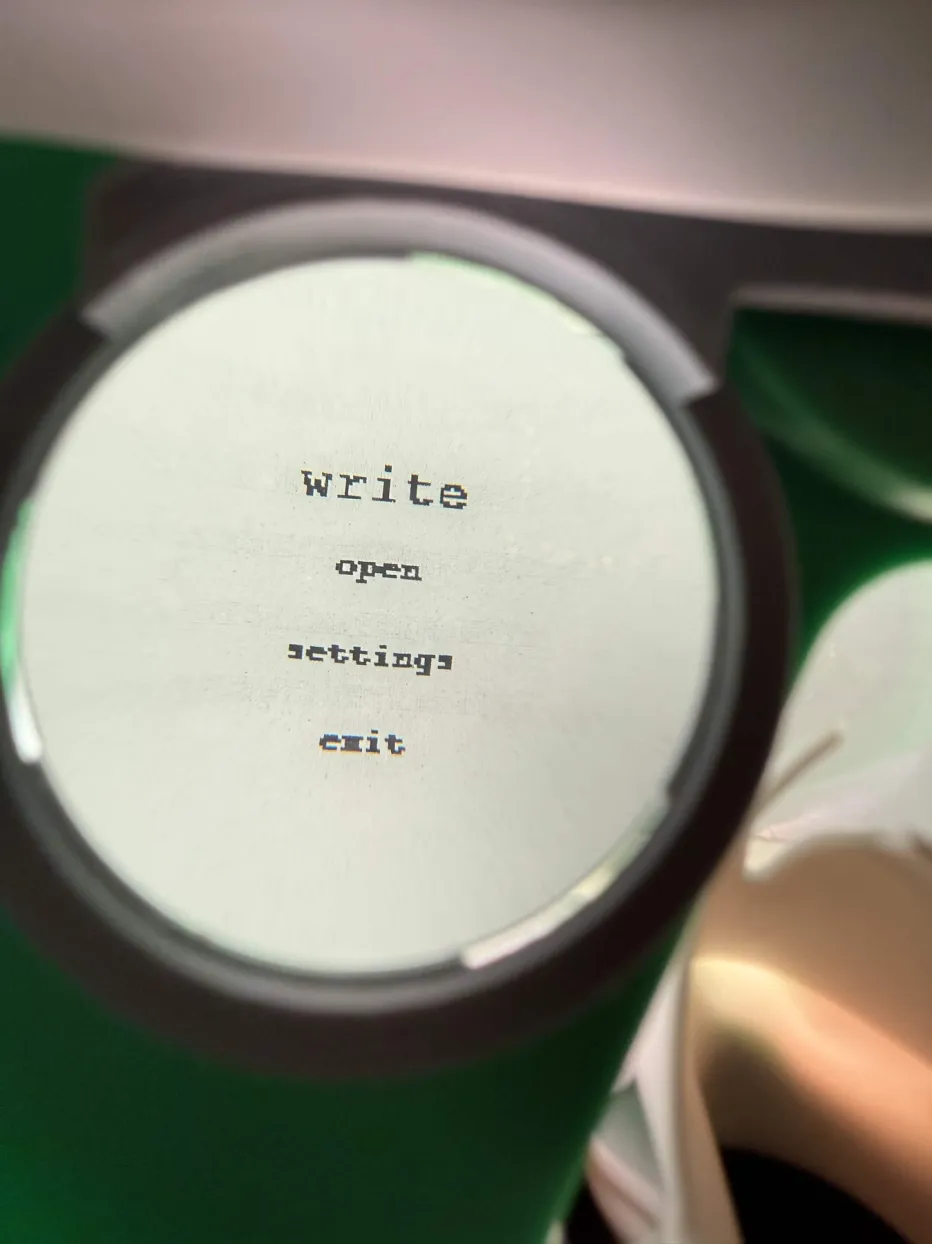
<p><img src="assets/images/projects/e-ink-vr/into-the-lens.webp" alt="Into the lens" /></p>

<p>The result, after I 3D printed a case, wired in some LEDs, and found a pair of lenses from the old google cardboard, was something new. It felt… well… like looking at magnified paper. Except that paper moved. My world was paper. It’s one of those things that you just have to experience.</p>

<p>The resolution of the e-ink wasn’t quite where it needed to be, but it was still possible to do some basic typing and reading. I will need a high resolution panel to keep testing, and I actually did get one that worked, and then I immediately stepped on it. Yep.</p>

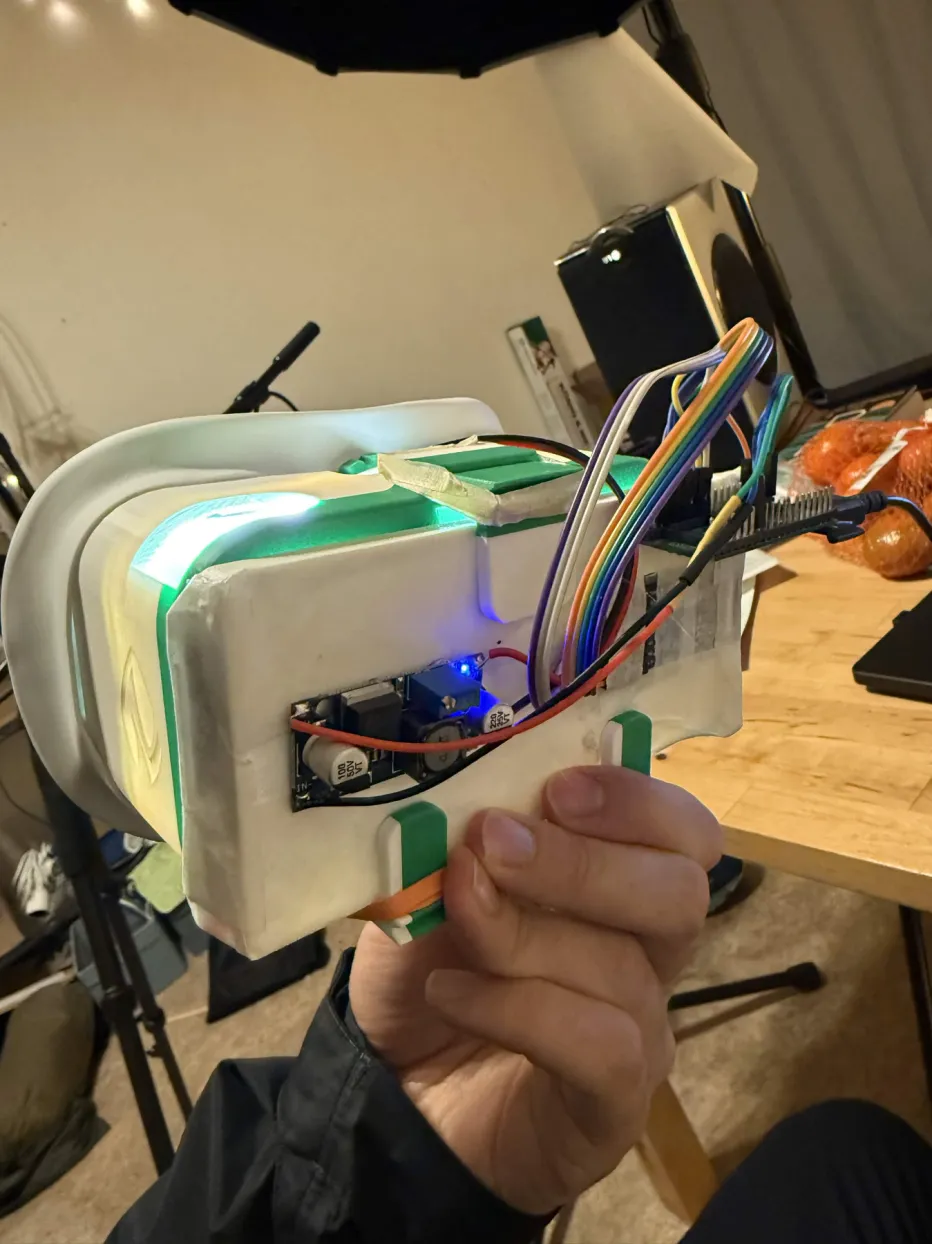
<p><img src="assets/images/projects/e-ink-vr/headset-front.webp" alt="Picture of the headset lens" /></p>

<p>Also the LEDs that illuminate the screen are okay, but nothing like being illuminated by natural light. There were some light leaks in the case, and I found that I actually preferred reading by the leaking light than the led light. For the next design I will also make it more open, possibly adding mirrors to redirect ambient light onto the screen and entirely removing the built in led.</p>]]></content><author><name></name></author><summary type="html"><![CDATA[skills used: Soldering Research Arduino Electronic testing Troubleshooting Sourcing 3D printing Optics CAD]]></summary></entry><entry><title type="html">drones for ukraine</title><link href="https://cforcomputer.github.io/drones-for-ukraine.html" rel="alternate" type="text/html" title="drones for ukraine" /><published>2025-10-12T00:00:00+00:00</published><updated>2025-10-12T00:00:00+00:00</updated><id>https://cforcomputer.github.io/drones-for-ukraine</id><content type="html" xml:base="https://cforcomputer.github.io/drones-for-ukraine.html"><![CDATA[<p>skills used:</p>
<ul>
  <li>3D Printing</li>
  <li>Soldering</li>
  <li>Electrical wiring</li>
  <li>Flight controller programming</li>
  <li>Drone piloting</li>
  <li>Battery assembly</li>
  <li>Ukrainian translation</li>
  <li>Drone tuning</li>
  <li>FPV controller setup</li>
</ul>

<p><a href="https://www.socialdrone.com.ua/en">view the social drone ukraine website</a></p>

<h3 id="finding-a-way-to-help-ukraine">Finding a way to help Ukraine</h3>

<p><img src="assets/images/projects/ua-drone/drone-testing.webp" alt="Picture of me testing a drone" /></p>

<p>About a year ago, I was reading yet another report about how a massive drone attack had killed dozens in Kyiv, and I decided that I no longer wanted to sit passively and not do something to help stop it. I didn’t want to blindly donate money, given the rampant charity fraud that we often hear about in the news, so I thought: I have a little bit of technical expertise, I have some resources, maybe I could volunteer to make drones. The first place that I checked was YouTube, and after a brief period of searching I came across a Ukrainian news segment about a girl named Misha, who was helping her father—a soldier fighting at the front—by building him drones in her apartment. After a lot of positive feedback from the front, it had quickly blossomed into a much larger movement which was named Social Drone Ukraine (Соціальний дрон).</p>

<p>The group is organized by Ukrainians for Ukrainians, but after a quick Google, I found their website, which also had a page in English that had links to directly donate money. On a whim, I instead applied to join their Telegram group, downloading the app, saying that I was an American living in Europe who wanted to help their movement. That I was a programmer and had some experience, and might be able to contribute. I translated the message into Ukrainian and sent the message.</p>

<p>It took about a day, and then my request to join was accepted. There were thousands of Ukrainians in the group, with channels ranging from R&amp;D, where users shared videos of their prototype drones and their improvements to the existing 3D models—to brutally graphic videos of the group’s drones being used in combat—but most importantly there were videos from the battalions on the front with stacks upon stacks of drones, thanking the group for their donations. It took a couple of days to figure out, but eventually I found the resource pages to build the drones that they wanted. It took several more days to realize that there was a dedicated channel for internationals, dozens of people from all over the world who had found the group just like I had. I watched with astonishment as someone in Poland asked if they could come to Ukraine to volunteer to build drones, and immediately, offers erupted to house them. I wasn’t ready to go that far, but I knew that I’d found what I was looking for.</p>

<p>SocialDroneUA provides a website that makes it clear where to order the parts for the drone. Aliexpress is almost always the source, a popular Chinese E-Commerce store which is also frequented in the United States and abroad. Here parts can be found for everything from barbie dolls to military grade infrared imaging systems. It can take several weeks for the parts to arrive, so I ordered my first kit from one of the recommended lists on their (modern, very polished) website, and waited. After two weeks, the first parts arrived in sealed anti-static bags. My carbon fiber frame, the video transmitter, the camera module, wires, soldering equipment, flight controller, and more. There were no instruction manuals for assembly, and I had no idea what I was doing, and that’s where I made my first mistake.</p>

<p>After assembling the frame, I immediately noticed a problem. Not everything was going to fit, the video transmitter was too large, and it looked like the frame I ordered was too small. Embarrassed, it took me a while to work up the courage to ask in their help channel what was wrong. I translated my message into Ukrainian like I had done before, and hid my face in my hands. It turned out that I ordered the S version of the frame, which was 5”, and the smallest they use is 7”, however, I had also ordered the parts for a kit that was used by another group, not SocialDroneUA’s kit, so there was more than one group using the parts website—something that I had missed in the translation. I ordered the correct parts and waited for another three weeks.</p>

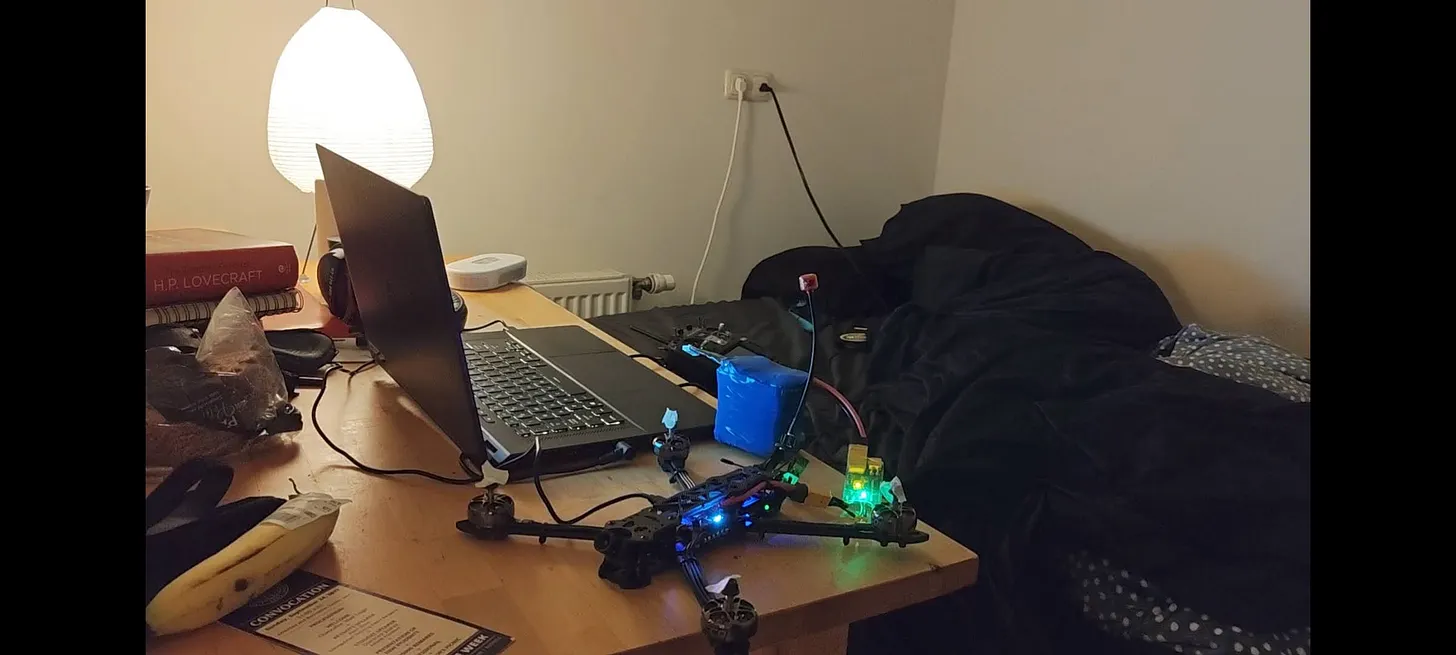
<p>With the new parts, I set to work following the provided guide (which was in English, made by an international volunteer). Only the 3D printed parts were outdated, but the new files were readily available on the website. I purchased my own 3D printer for this project. You can also order 3D prints from online service providers. The material that they use is a Ukrainian brand Elastan D100, which is just 95% TPU. They are very particular about the soldering job, and I redid my solder joints again and again until I was sure it was perfect. I didn’t want my drone to be the one that falls on top of the wrong person with a bomb strapped to it.</p>

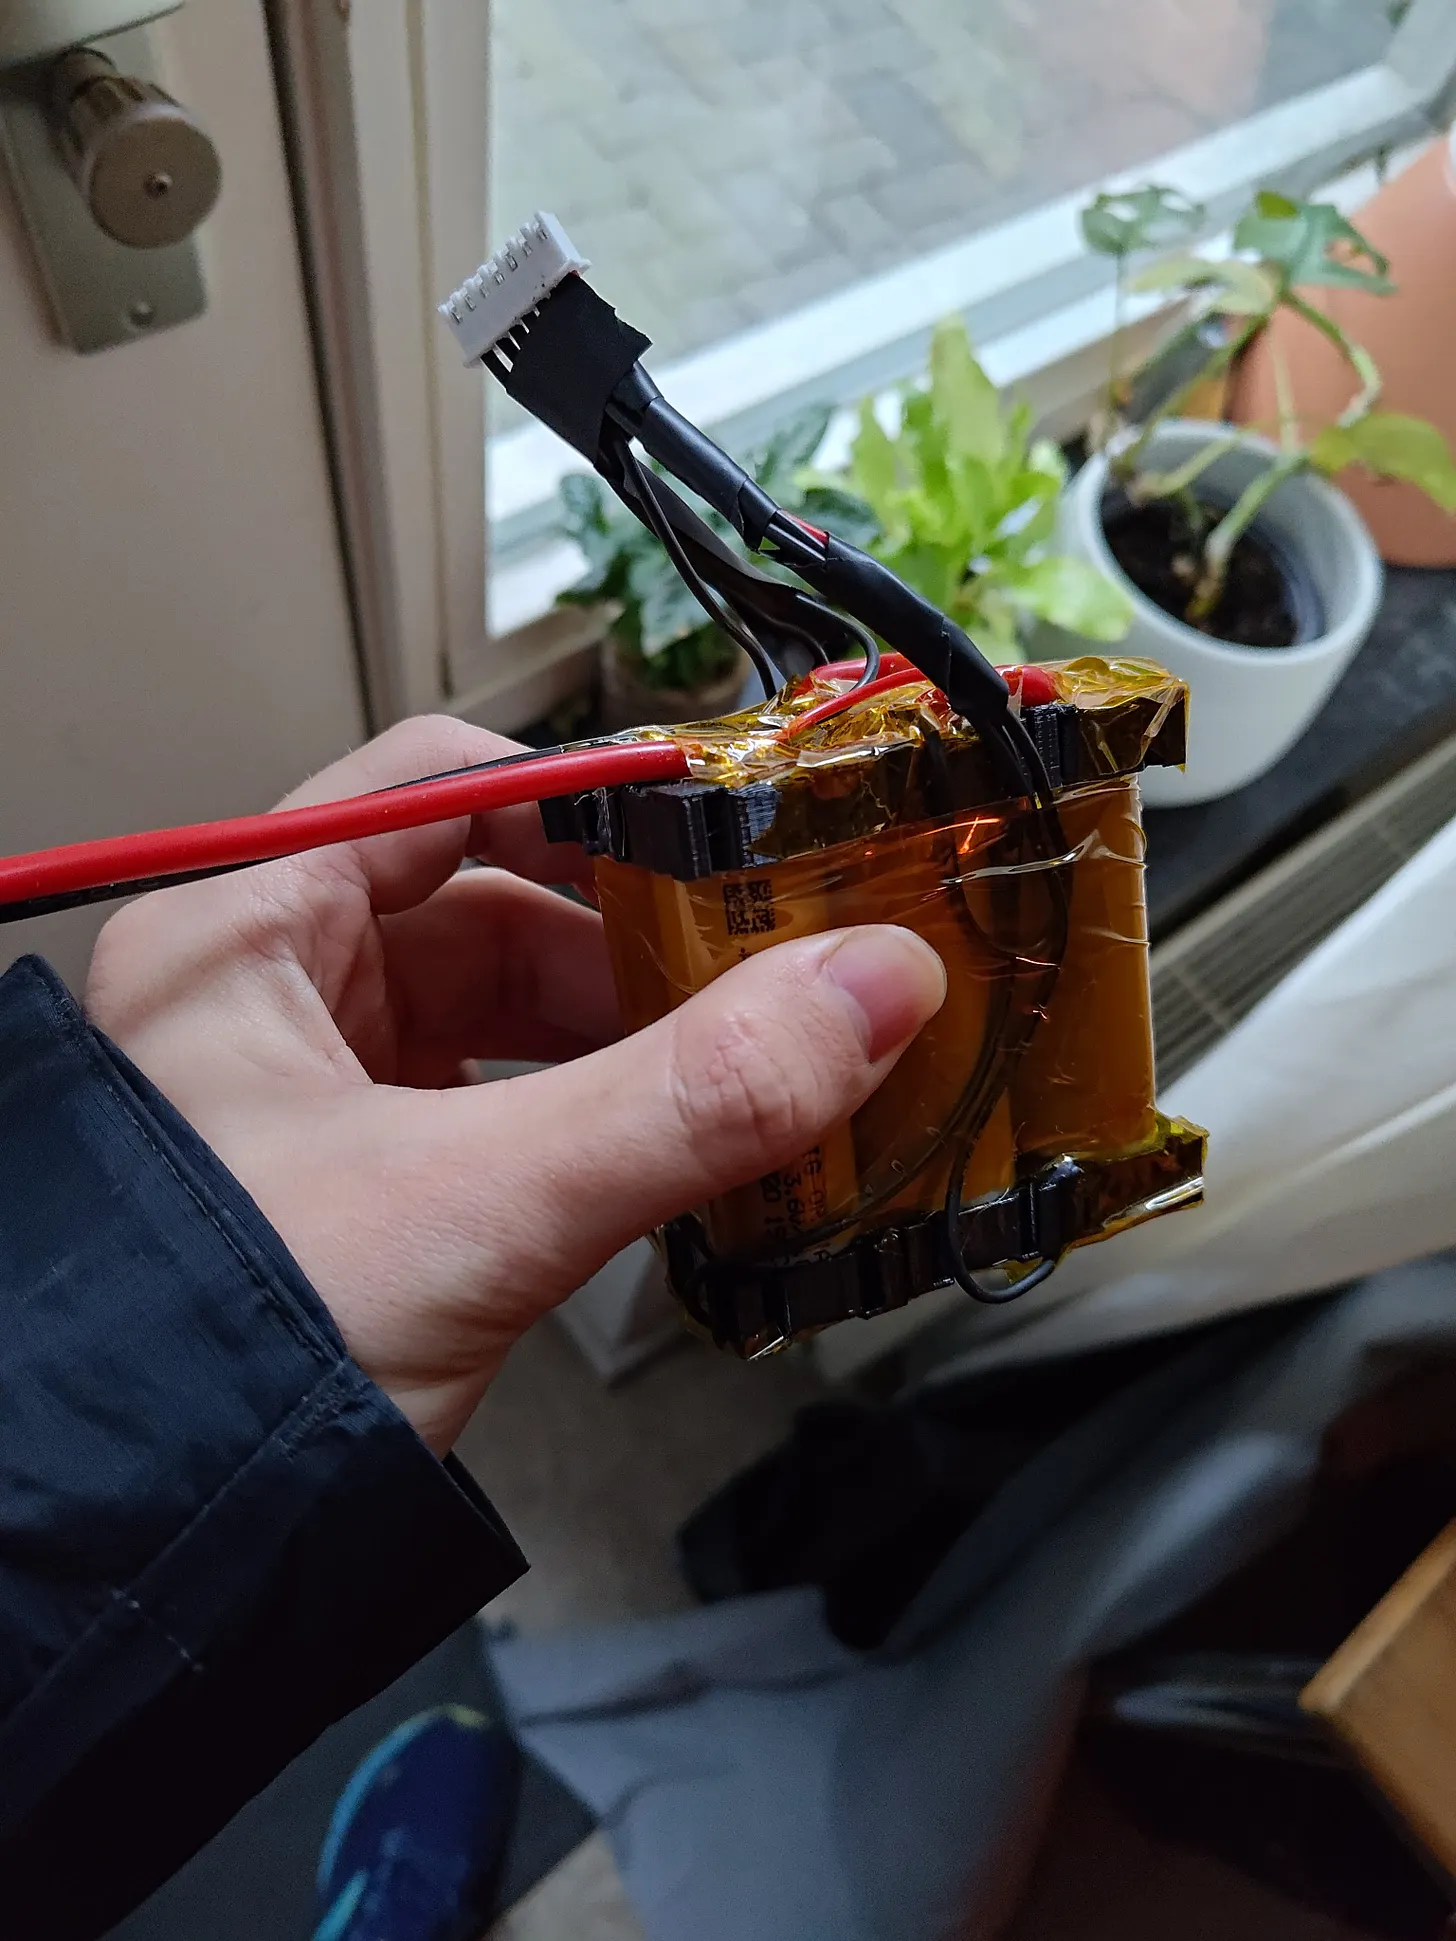
<p>Connecting the rest of the parts was a breeze and it was clear from the instructions what to do. The last part was flashing the software. This took a long time, and I ended up buying the full goggles, controller, and built my own battery to be sure it would work correctly out of the box. This was entirely unnecessary but I wanted the satisfaction of knowing it all worked before I sent it. The full software configuration is on their website, and you can download and flash it using Betaflight and ELRS configurator. There aren’t good instructions for this but you can find some guides on YouTube. I plan on making a detailed guide on this step at a later time.</p>

<p><img src="assets/images/projects/ua-drone/battery.webp" alt="Picture of my DIY battery pack" />
Finally, to ship the drone you have to find a company that ships to Ukraine. Meest seems to be the only one that is reliable, which is the one I ended up using. There are also volunteer groups that you can send the drone to that will bring it across the border when they deliver other supplies if you are in Poland, Germany, or another nearby country. The locations to deliver the drone are provided when you register the drone in the system to get your ID code. The delivery points change regularly and are random post offices in different cities—in this way there is no one point for the Russians to bomb to stop the delivery of these drones.</p>

<p>Delivery for my drone took about two weeks. First it is shipped to Poland by DHL, and then to Ukraine by the courier. The status of the drone is updated in Telegram and I was notified when it was received. It was tested, then shipped to a battalion for training. About a month later I received another notification that it had been sent to a different battalion on the front line for use in combat. The total cost was around $350 after shipping for the final drone. Mission accomplished.</p>

<p>If you would like to learn more—consider applying to join the Telegram group and visiting <a href="https://www.youtube.com/@SocialDroneUA">SocialDroneUA’s youtube channel</a>.</p>]]></content><author><name></name></author><summary type="html"><![CDATA[skills used: 3D Printing Soldering Electrical wiring Flight controller programming Drone piloting Battery assembly Ukrainian translation Drone tuning FPV controller setup]]></summary></entry><entry><title type="html">internet radio</title><link href="https://cforcomputer.github.io/internet-radio.html" rel="alternate" type="text/html" title="internet radio" /><published>2025-02-03T00:00:00+00:00</published><updated>2025-02-03T00:00:00+00:00</updated><id>https://cforcomputer.github.io/internet-radio</id><content type="html" xml:base="https://cforcomputer.github.io/internet-radio.html"><![CDATA[<p>skills used:</p>
<ul>
  <li>Arduino (C++)</li>
  <li>Prompt Engineering</li>
  <li>3D CAD (Onshape)</li>
  <li>3D Printing</li>
  <li>Electrical</li>
</ul>

<p><a href="https://github.com/cforcomputer/TTGOInternetRadio">view project code</a></p>

<h3 id="internet-radio-project">Internet radio project</h3>

<h4 id="my-introduction-to-hardware-prototyping">My introduction to hardware prototyping</h4>

<p><a href=""><img src="assets/images/projects/radio-prototypes.jpg" alt="Internet radio demo" /></a>
<em>Click the image to watch a demo video.</em> (has not been created yet)</p>

<p>The internet radio was one of my first serious CAD projects where I attempted to build a fun enclosure for a full featured internet radio.
It uses a TTGO V1 display which is a modified ESP32. It looked like a fun board to mess with, but if I were to do the project over I’d have 
gone with the newest ESP32 chip. (just for the sake of being able to use all the up-to-date libraries).</p>

<p>The radio can:</p>
<ol>
  <li>Act as a bluetooth speaker or BT to 3.5mm adapter</li>
  <li>Create a wifi configuration portal</li>
  <li>Allow the user to add any internet radio station</li>
  <li>Act as a visualizer for music</li>
</ol>

<p>I was surprised by how few working internet radio projects there were. Most of the examples that I found were no longer functional or too limited. 
I forked a project that I found on youtube, but it was non-functional and I ended up redoing the entire thing with a different audio library.</p>

<p><img src="assets/images/projects/radio3d.png" alt="CAD drawing in Onshape" />
I used Onshape for the 3D component of this project, and went through many iterations of the enclosure before I landed on one that was fully usable. 
I was surprised by how long it takes to find the perfect positioning for all the buttons. I have a newfound respect for simple builds, it takes a lot
of time investment to get it right.</p>

<p>The bluetooth pairing to my phone and pc works flawlessly. 
<img src="assets/images/projects/radio-bluetooth.jpg" alt="Internet radio bluetooth mode" /></p>

<p>WIP post. more TBA</p>]]></content><author><name></name></author><summary type="html"><![CDATA[skills used: Arduino (C++) Prompt Engineering 3D CAD (Onshape) 3D Printing Electrical]]></summary></entry><entry><title type="html">writing a scifi novel</title><link href="https://cforcomputer.github.io/writing-a-scifi-novel.html" rel="alternate" type="text/html" title="writing a scifi novel" /><published>2024-05-27T00:00:00+00:00</published><updated>2024-05-27T00:00:00+00:00</updated><id>https://cforcomputer.github.io/writing-a-scifi-novel</id><content type="html" xml:base="https://cforcomputer.github.io/writing-a-scifi-novel.html"><![CDATA[<p>skills used:</p>
<ul>
  <li>Creative writing</li>
  <li>Imagination</li>
  <li>Discipline</li>
</ul>

<p><a href="https://www.youtube.com/playlist?list=PLGYsoU9CFGfc">I read the entire book on youtube</a></p>

<h3 id="sule---a-scifi-novel">Sule - a scifi novel</h3>

<p>It takes a long time to write a GOOD book. It takes a lot of thinking, it’s almost like engineering. You have to weave all the plot points together into something that makes sense. You have to build people from the ground up who not only seem real, but are interesting, and likable! It’s really hard!</p>

<p>I started seriously writing Sule in 2023. I didn’t expect it to get published, I’ve never written any complete story before, so whatever the end result was–I kept telling myself it would be disappointing, so I wouldn’t be disappointed when it actually was, but of course I wanted it to be good. I felt that it could be good.</p>

<p>Well, it’s done now. I’m honestly not that impressed. I am a bit disappointed, but also a bit excited. I did finish it. Almost 110,000 words that mostly make sense! I think the next one, whatever it is, could be a lot better. Whether it’s good or not, I invite you to listen and decide for yourself. If you’d rather read it you can send me a message and I’ll send you a copy.</p>]]></content><author><name></name></author><summary type="html"><![CDATA[skills used: Creative writing Imagination Discipline]]></summary></entry><entry><title type="html">the itemfinder</title><link href="https://cforcomputer.github.io/the-itemfinder.html" rel="alternate" type="text/html" title="the itemfinder" /><published>2024-01-14T00:00:00+00:00</published><updated>2024-01-14T00:00:00+00:00</updated><id>https://cforcomputer.github.io/the-itemfinder</id><content type="html" xml:base="https://cforcomputer.github.io/the-itemfinder.html"><![CDATA[<video autoplay="" loop="" controls="" muted="" playsinline="" preload="metadata" poster="/assets/images/projects/itemfinder-svelte.png" style="max-width: 100%; height: auto;">
  <source src="/assets/videos/itemfinder/itemfinder.mp4" type="video/mp4" />
  Your browser does not support embedded video. <a href="/assets/videos/itemfinder/itemfinder.mp4">Download the demo</a>.
</video>
<p><em>Itemfinder demo video.</em></p>

<p>skills used:</p>
<ul>
  <li>python</li>
  <li>apis</li>
  <li>sql</li>
  <li>sveltekit</li>
</ul>

<p><em>Project code is private (sorry)</em></p>

<p><img src="assets/images/projects/itemfinder.png" alt="Itemfinder tool picture" />
<em>The original itemfinder tool built in Python</em></p>

<h3 id="the-problem">The problem</h3>

<p>The company that I work for manually searches Ebay for item listings, in order to source and restock inventory. Since listings are not the same on every ebay site (DE, US, IT, etc.), the sourcing team has to check every site. Furthermore, many of these items have different SKU codes, these slight variations are all the same item. However, they must search for each SKU code individually.</p>

<p>It can take days to search through all the sku codes for a set of items. It is labor intensive and an employee must click through every page to find the best deals.</p>

<h3 id="the-solution">The solution</h3>

<h4 id="i-present-the-itemfinder">I present! The itemfinder!</h4>

<p>Now instead of 5 hours, the average search takes less than 20 minutes. The time savings are approximately 74% for single SKU item searches, and over 93% for multi-SKU searches.</p>

<p>The Itemfinder started out as a barebones python application, but over time the purchase team continuously asked for tweaks and updates. After installation and admin rights were restricted as a part of an IT update, I had visitors at my desk every few days asking for updates on when it would work again. The purchase team said that they didn’t want to work anymore without it!</p>

<p>The best solution that I found was porting the Python program into a webapp. I’d heard a lot of good things about Sveltekit, so I decided to learn how to use it for this project. This way nobody would have to download and install software, they could just access the tool from their browser, and all updates would be handled remotely.</p>

<p>The original python application would only use the Ebay API to retrieve live listings. With the API search it is very specific and sometimes is missing local listings, so in order to be absolutely sure all listings are retrieved, it combines the results from over a dozen different webscraping bots. The bots collect data from all major competitor websites.</p>

<p>The bots I’ve built up over my two years at JC-Electronics and the most important ones like Ebay run multiple times per day. These bots collect over 20 million different product listings PER DAY. The results are run through the scraper’s parsers and the data is prepared inside multiple Alteryx workflows. The final data is uploaded to a central data warehouse running MySQL.</p>

<p>The most valuable improvement that I made was the ability for the purchase team to make a combination search for products with multiple SKUs. They can create a list for a product, then click search, and if the title matches a “convert code” then it will search for every item in the convert code list and combine the results, filtering and sorting by price. Some items have over a hundred potential combinations (convert codes), and before this tool they would have to search each one individually, checking every competitor website and ebay site for the best prices. All of this now is done automatically.</p>]]></content><author><name></name></author><summary type="html"><![CDATA[Your browser does not support embedded video. Download the demo. Itemfinder demo video.]]></summary></entry><entry><title type="html">zcamp</title><link href="https://cforcomputer.github.io/zcamp.html" rel="alternate" type="text/html" title="zcamp" /><published>2023-10-16T00:00:00+00:00</published><updated>2023-10-16T00:00:00+00:00</updated><id>https://cforcomputer.github.io/zcamp</id><content type="html" xml:base="https://cforcomputer.github.io/zcamp.html"><![CDATA[<p>skills used:</p>
<ul>
  <li>python</li>
  <li>javascript</li>
  <li>svelte</li>
  <li>webhooks</li>
  <li>sql</li>
</ul>

<p><a href="https://github.com/cforcomputer/eve-online-killmail-hunter">Project code (original python tool)</a></p>

<p><a href="https://github.com/cforcomputer/zcamp">Project code for Zcamp</a></p>

<p><img src="assets/images/projects/zcamp/zcamp.png" alt="Zcamp picture showing the detected camps" /></p>

<h3 id="zcamp-for-eve-online">Zcamp for Eve Online</h3>

<p>The zCamp project started as a way to create an alarm to locate officer NPCs that killed players. An officer NPC in EVE Online is the rarest enemy, and their
item drops can be some of the most valuable items in the game universe. The goal was to hopefully reach these unsuspecting players before they had realized what had happened.
They are also quite difficult to defeat, so it was not unreasonable to assume that they may still be at the location long after the player had died.</p>

<p>Firstly, I took the available websocket provided by the player run service zkillboard.com. Then I created my own filter rules with Python and a Tkinter GUI,
allowing for more fine grained control like item type and ship grouping for the live feed. Zkillboard allows you to filter on past results,
but the live feed of results was not able to be filtered on, furthermore there was no way to set a notification if a new player loss
appeared. My tool achieved both these aims, and I was shocked to find not one, but two officer NPC losses the next morning.</p>

<p>After several days of analysis and multiple officer NPCs destroying players, I realized that there was a connection. The ships were all the
same, and their loadouts were nearly identical. They were drone boats, which are one of the few weapon systems in the game that will
automatically attack targets without cheating. I realized that there was a large, organized effort to farm the rarest NPCs in the game,
which up until that point I’d thought were purely random.</p>

<p>Coincidentally, around the same time, a Russian youtuber began posting videos about farming officer NPCs in EVE Online. He found that the probability for an
officer to spawn was exactly 0.1% and not based on random factors. This means that if a player destroys 1000 waves of NPCs (which respawn every 30 minutes),
there is a guarantee that an officer NPC will spawn. This took away a bit of the mystery for me surrounding officer NPCs in general, and led to me seeing what
other use cases I could create using the killmail data from zKillboard.</p>

<hr />

<p>I noticed that every killmail has an exact coordinate point in the system that determines the nearby celestials. After doing some digging I was able to find
a file that CCP games provides to the community that has the exact coordinate points of every celestial and object in the game. This got me excited, as I realized
then that I could completely rebuild the universe’s game map in my application, which has a lot of implications!</p>

<ul>
  <li>I can track paths for groups of players as they transition from system to system</li>
  <li>I can warn players when systems they are about to travel into have specific hostile activity, essentially creating a tool that allows you to travel through the game without worrying about gate camps (blockades set up by other players to kill players when they enter a new region).</li>
  <li>I can make a sick visualization that shows live activity through the game</li>
  <li>I can calculate routes and display them in my version of the game map, and use the CCP Games API to set that destination in the game for the player, along with waypoints. This way the player can create a risk-free route ingame through my application, avoiding all active gate camps.</li>
</ul>

<p>I mentioned what I could do to the creator of zKillboard, and was a bit surprised by the lack of interest. In particular, the ability to track gangs as they travel and the route warning tool seemed particularly valuable.
He did give me a useful bit of advice regarding the application itself. He said that players don’t trust software that you have to download, so it would be best if I turned it into a web application. That’s exactly what I did next.</p>

<p>Not having a solid grasp of typescript yet, I decided to keep this as simple as possible and just use JavaScript, which I was most familiar with. For the frontend, I’d heard a lot of good things about Svelte recently, so I decided to use that.</p>

<p>I tested a couple of different hosting providers, but I was doing a ton of pulling and pushing, so I burned right through the trial period of Railway, which was a great app and dev service, just way too expensive!
I ended up picking Hetzner for the cloud hosting because of its excellent pricing (better than AWS, Azure, all these other ones), it was also located nearby in Germany and had a discount with the trial for the service I was setting up, Coolify.
Coolify made it effortless to constantly fetch and deploy my docker containers and allowed me to host multiple web services and databases on a single shared instance for only $10 per month. On top of all that, Coolify was free and open source. 
I highly recommend it for quick prototyping as an alternative to tools like Firebase that require vendor lock in and high prices. As far as I know, there is no better budget option.</p>

<p>After several months of development work, I had several new features working in my tool</p>

<p><img src="assets/images/projects/zcamp/campcrushers.png" alt="Zcamp picture showing the detected camps" /></p>
<ol>
  <li>A minigame called “campcrushers” to get rewards for attempting to or succeeding in the destruction of gatecamps</li>
</ol>

<ul>
  <li>Players earn points for having their kill id appear on the killmail of the gatecampers</li>
  <li>Points are permanently recorded in the PostgreSQL database and used to generate a leaderboard</li>
  <li>Users can share their points counter in their eve profile using a unique profile page in zCamp created with an autogenerated, permanent url.</li>
</ul>

<p><img src="assets/images/projects/zcamp/campcrushers-selection.png" alt="Campcrushers minigame" />
<img src="assets/images/projects/zcamp/campcrushers-selected.png" alt="Campcrushers minigame" /></p>

<p><img src="assets/images/projects/zcamp/live-filter-feed.png" alt="The live filter feed" /></p>
<ol>
  <li>A live feed of the parsed killmails that allow the user to filter in real time against all the killmails in the last 24 hours as the feed continues to update.</li>
</ol>

<ul>
  <li>Users can set alerts for audio notifications when a kill makes it past their filters</li>
  <li>Users can set a discord webhook, if a kill makes it past their filters it will notify them in discord.</li>
  <li>Users can create and save permanent profiles of their settings to quickly load them next time they log in.</li>
</ul>

<p><img src="assets/images/projects/zcamp/active-battles.png" alt="Zcamp picture showing active battles bubbles" /></p>
<ol>
  <li>A bubble map where bubbles appear to inflate based on kills in the last 5 minutes, showing all active battles as they happen and die out in the game. The bubbles change color based on whether they are about to pop.</li>
</ol>

<p><img src="assets/images/projects/zcamp/salvage-fields.png" alt="Zcamp picture showing the detected camps" /></p>
<ol>
  <li>Salvage fields. Filters are applied to show the user where kills have occurred in the last two hours (before a wreck expires) with ships that are tech level 2, meaning they drop extra loot when salvaged, where T1 drop next to nothing.</li>
</ol>

<p><img src="assets/images/projects/zcamp/npc-hunter.png" alt="Zcamp picture showing the detected camps" /></p>
<ol>
  <li>An officers, belt commanders, and mordus legion detector that notifies the user if a player dies to these unique, rare npcs.</li>
</ol>

<p><img src="assets/images/projects/zcamp/system-map.png" alt="Zcamp picture showing the system map with triangulation." /></p>
<ol>
  <li>
    <p>The solar system map that allows the user to see the point of the kill in relation to all the celestials in the star system, rendered in beautiful 3D with their orbit paths using ThreeJS.</p>
  </li>
  <li>
    <p>Triangulator minigame: A way to find the player wrecks without a bookmark.</p>
    <ul>
      <li>Using several mathematical calculations we determine whether the point of a killmail exists within four celestial bodies. If the point exists, then we enrich the killmail data with the coordinate points of the closest celestials it exists between. Based on this information, the user can warp between the four points placing bookmarks at closer and closer intervals until eventually they reach the wreck itself and can loot or salvage it. My friends and I had a lot of fun doing this and made several billion isk pretty quickly. If you message the person in advance, a lot of times they will tell you if they can’t reach the wreck.</li>
      <li>Players often don’t expect someone to be able to reach the wreck at all, so if you are quick you could also steal it from them while the site is still active.</li>
    </ul>
  </li>
</ol>

<p><img src="assets/images/projects/zcamp/full-galactic.png" alt="The full galactic map" /></p>
<ol>
  <li>The real time global activity map showing live fights, active roam paths, and a lot more! The map is rendered in full 3D using ThreeJs, then flattened into regions for easier viewing. It was a bit difficult to tell where things were happening otherwise.
    <ul>
      <li>The user can set the destination in the map and add waypoints</li>
      <li>If there is hostile activity along the route, it will notify them.</li>
    </ul>
  </li>
</ol>

<p><img src="assets/images/projects/zcamp/ingame-threats-checker.png" alt="Zcamp picture showing the detected camps" /></p>
<ol>
  <li>Live tracking of the user as they traverse through the game world.
    <ul>
      <li>For each system change, we can ping the EVE Online API to retrieve the user’s live location in the game world. We can compare the user’s current system against our rendered map to determine all possible gates they could be jumping into and warn them if there is an enemy on the other side.</li>
    </ul>
  </li>
</ol>

<p><img src="assets/images/projects/zcamp/log-in.png" alt="Zcamp picture showing the detected camps" /></p>
<ol>
  <li>Naturally, for these features to work we had to find a way to bind it all to the player Oauth login with EVE Online
    <ul>
      <li>Each login is paired with a unique code that is used for API calls and to keep track of the player account in our local database.</li>
      <li>Features like minigames and profiles only start working after you’ve logged in.</li>
    </ul>
  </li>
</ol>

<p>To reduce the potential of bot spam I added a cloudflare check screen that appears when you first visit the application. I intend to remove this because it adds too much of a wait when users first try to visit the application.</p>

<p>[wip]</p>]]></content><author><name></name></author><summary type="html"><![CDATA[skills used: python javascript svelte webhooks sql]]></summary></entry><entry><title type="html">graphic design portfolio</title><link href="https://cforcomputer.github.io/graphic-design.html" rel="alternate" type="text/html" title="graphic design portfolio" /><published>2023-06-25T00:00:00+00:00</published><updated>2023-06-25T00:00:00+00:00</updated><id>https://cforcomputer.github.io/graphic-design</id><content type="html" xml:base="https://cforcomputer.github.io/graphic-design.html"><![CDATA[<p>skills used:</p>
<ul>
  <li>adobe photoshop</li>
  <li>adobe illustrator</li>
  <li>photography</li>
  <li>digital painting</li>
</ul>

<h3 id="optimer-international">Optimer International</h3>
<p>I created product logos for their new line of kitchen products, one of which was selected.</p>
<details><summary>View logo prototypes for "Nakiyo" brand</summary>
    <img src="assets\images\graphics\weekend1-8.png" alt="nakiyo images 1" height="200" />
    <img src="assets\images\graphics\weekend2-8.png" alt="nakiyo images 2" height="200" />
    <img src="assets\images\graphics\weekend3-8.png" alt="nakiyo images 3" height="200" />
    <img src="assets\images\graphics\weekend4-8.png" alt="nakiyo images 4" height="200" />
    <img src="assets\images\graphics\weekend5-8.png" alt="nakiyo images 5" height="200" />
    <img src="assets\images\graphics\weekend6-8.png" alt="nakiyo images 6" height="200" />
</details>

<details><summary>View final "Nakiyo" products</summary>
Dozens of Nakiyo brand products are now for sale on Chef's depot, Seattle Cutlery, and numerous stores.
    <img src="assets\images\graphics\nakiyo1.png" alt="Black nakiyo knife" />
    <img src="assets\images\graphics\set1a.webp" alt="wood japan nakiyo set" />
</details>

<h3 id="concept-art">Concept Art</h3>
<p>During high school, I had dreams of becoming a concept artist for big studios, for both film and videogames. I spent thousands of hours drawing, creating new designs, and watching tutorial videos online. I am entirely self taught.</p>
<details><summary>Concept Art</summary>
Concept art created in 2013-2014 for Muse Games New York, RSI, and CCP Games and on commission.
Additional artworks are on my artstation account. patrickobrien.artstation.com
<img src="assets\images\graphics\character-concept.jpg" alt="character concept art" />
<img src="assets\images\graphics\robot.jpg" alt="character concept art" />
<img src="assets\images\graphics\star-citizen.jpg" alt="character concept art" />
<img src="assets\images\graphics\tank.jpg" alt="character concept art" />
<img src="assets\images\graphics\hl3.webp" alt="half life fanart" />
</details>

<h3 id="association-for-computing-machinery">Association for Computing Machinery</h3>
<p>While I was an officer for the UWB ACM, I designed posters, stickers, magnets, t-shirts, and websites for events.</p>
<details><summary>UWBHacks Event</summary>
A magnet that I designed for the event.
<img src="assets\images\graphics\event-magnet.jpg" alt="uwbhacks magnet retro 80s" />
</details>
<p>Additional projects to be added</p>]]></content><author><name></name></author><summary type="html"><![CDATA[skills used: adobe photoshop adobe illustrator photography digital painting]]></summary></entry></feed>